INTRODUCTION
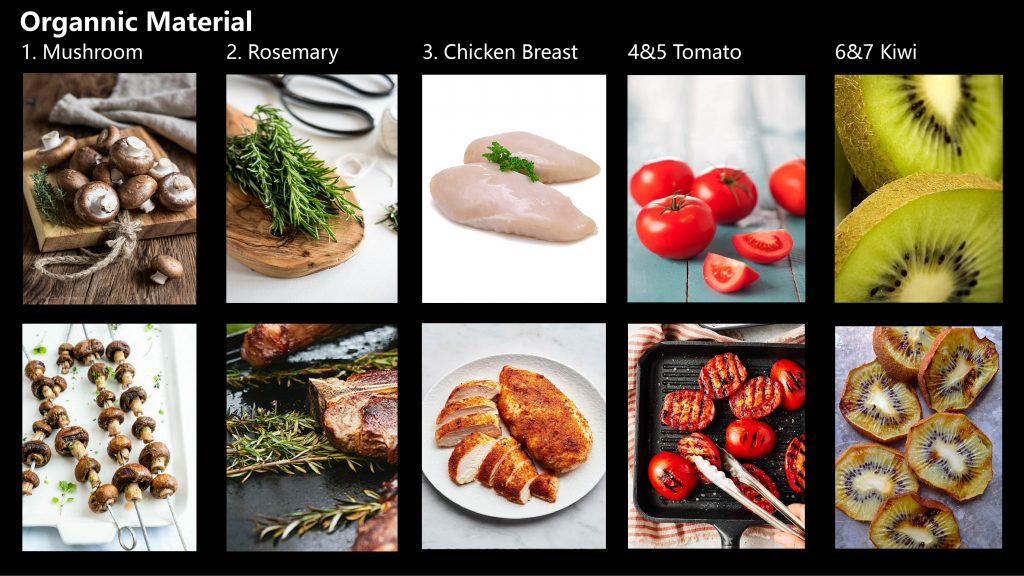
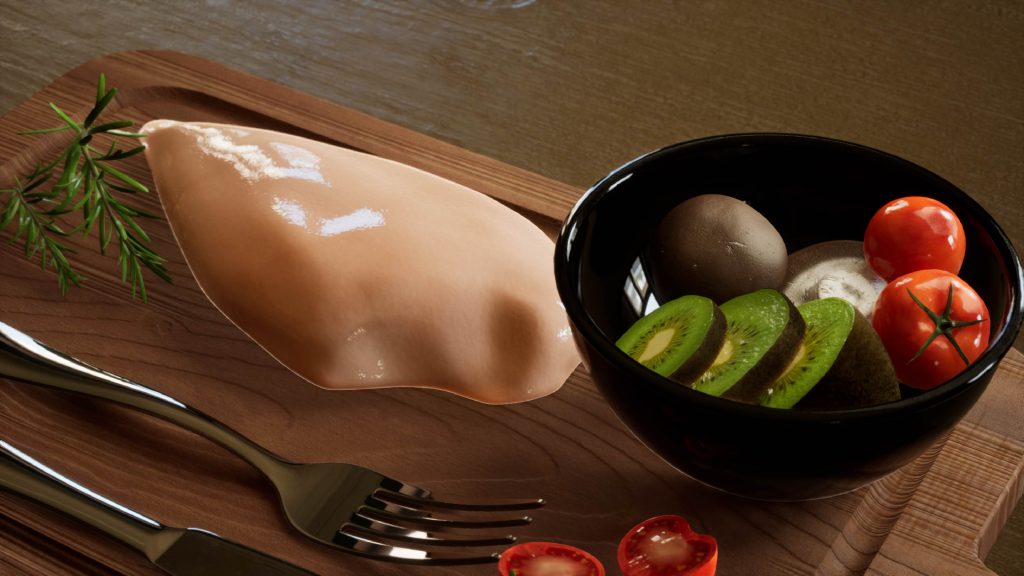
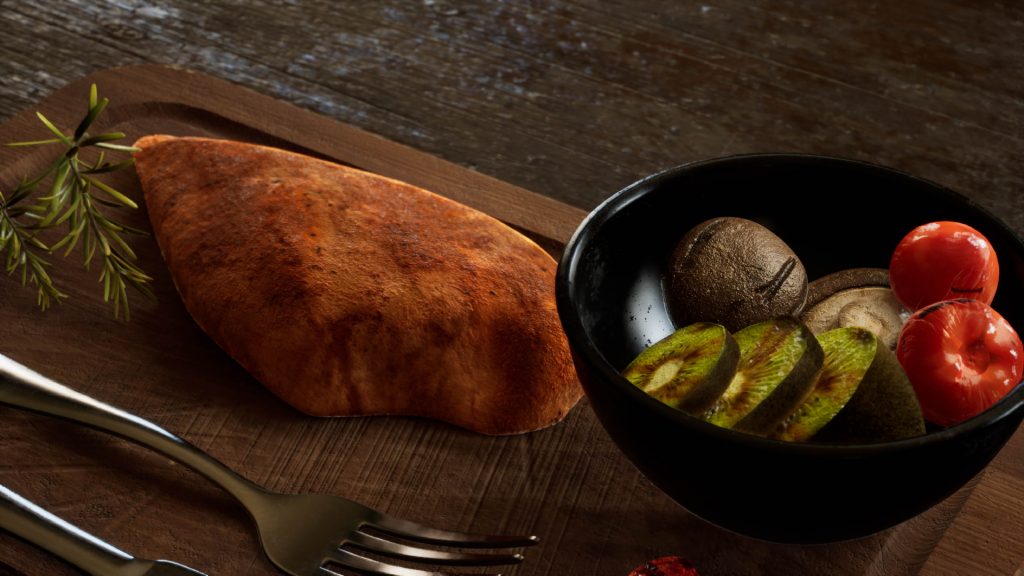
This project highlights the use of organic materials for both fresh and cooked food, created using Substance Designer and Substance Painter. It showcases exemplary interior lighting setups, mesh layouts, and detailed materials for each fruit. Our main focus should be on the rich variety of textures and achieving effective shader and shading setups in UE5. The challenge lies in mastering post-volumetric processing to enhance these textures.
Technical Breakdown
- Material individual analysis
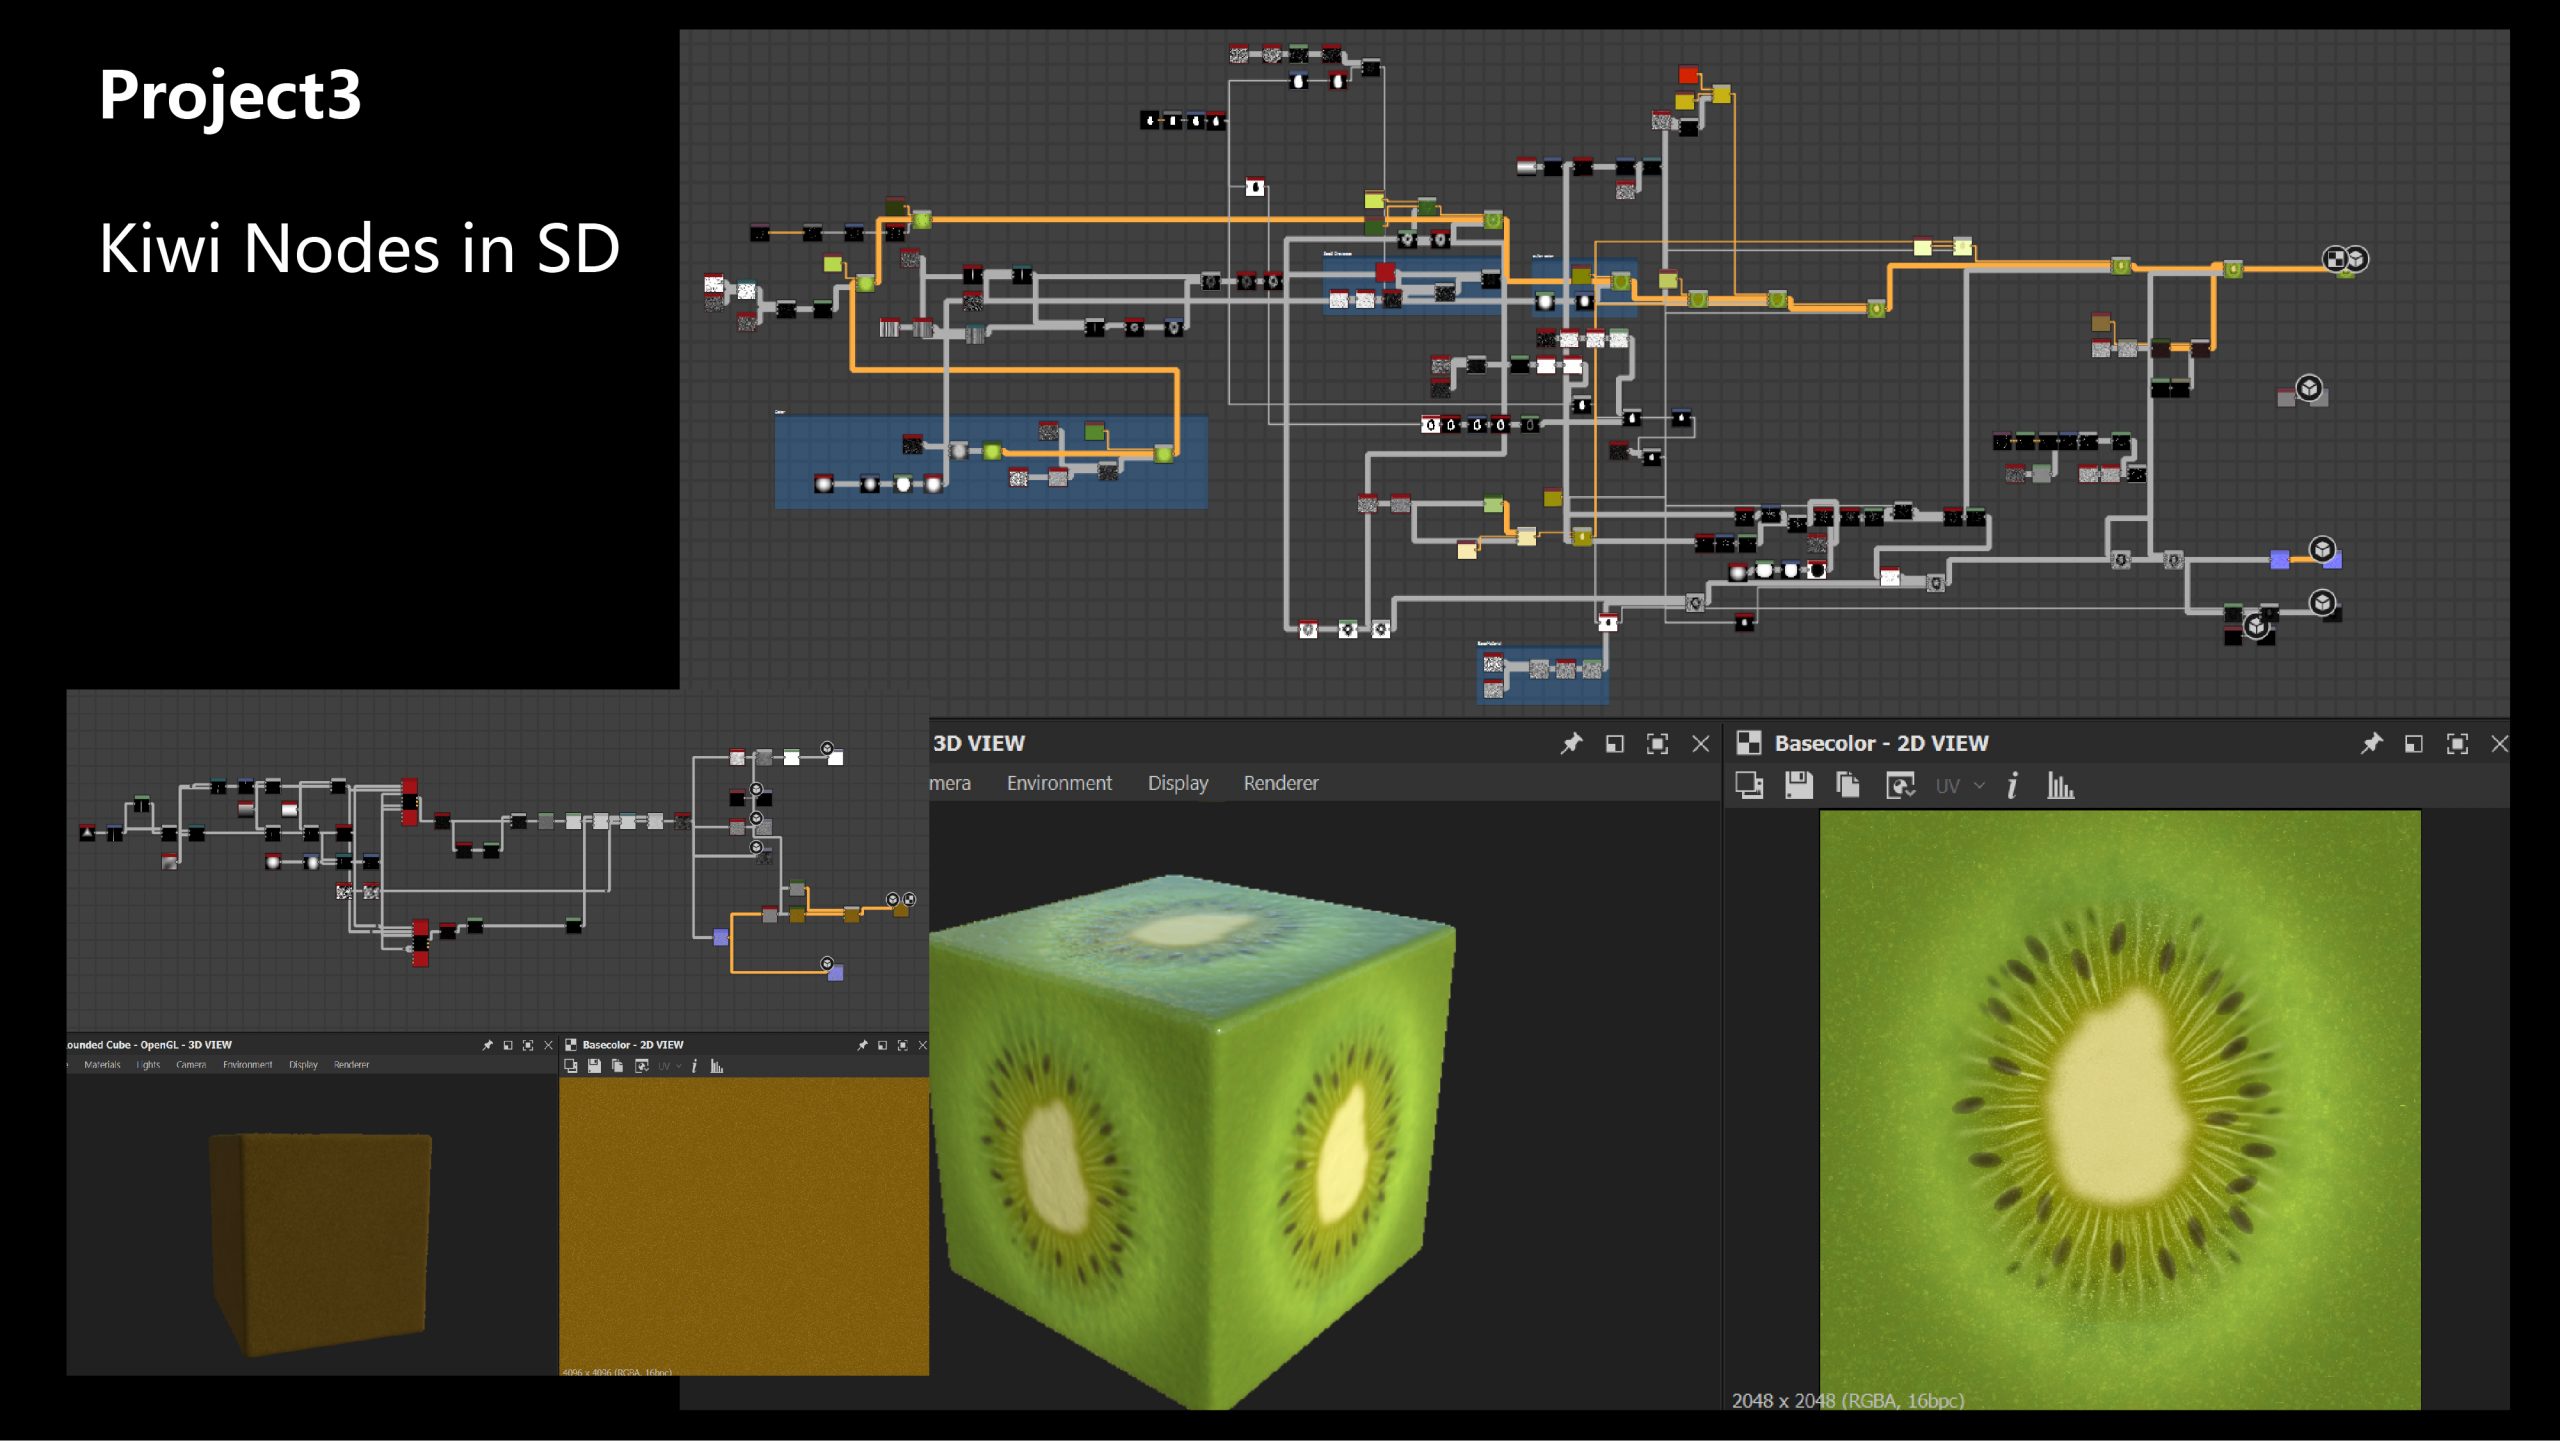
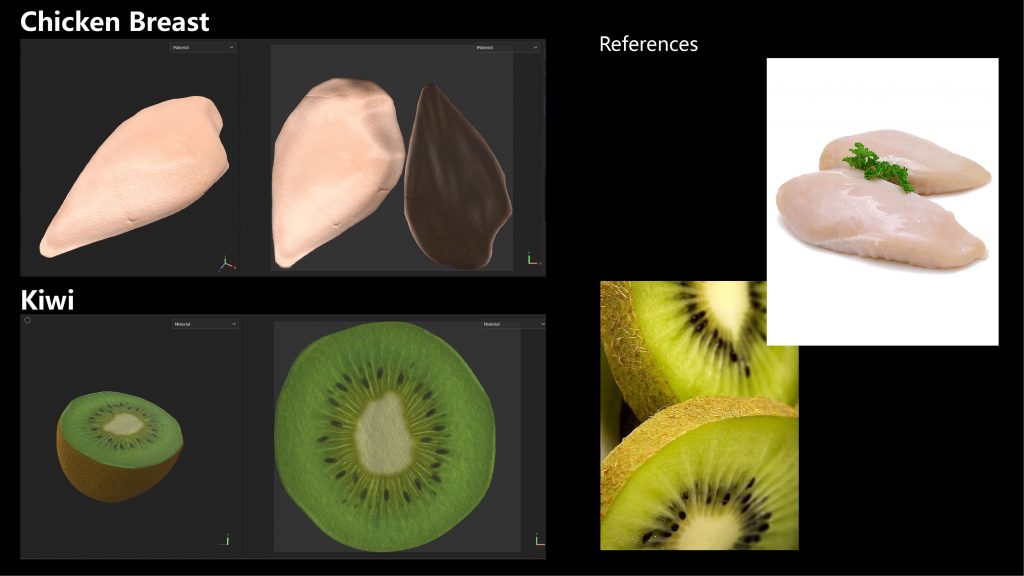
- In this project, I created six organic materials, each with its own unique characteristics. Starting with the kiwi, I used Adobe Illustrator to help design the interior shape, which is particularly useful for beginners.
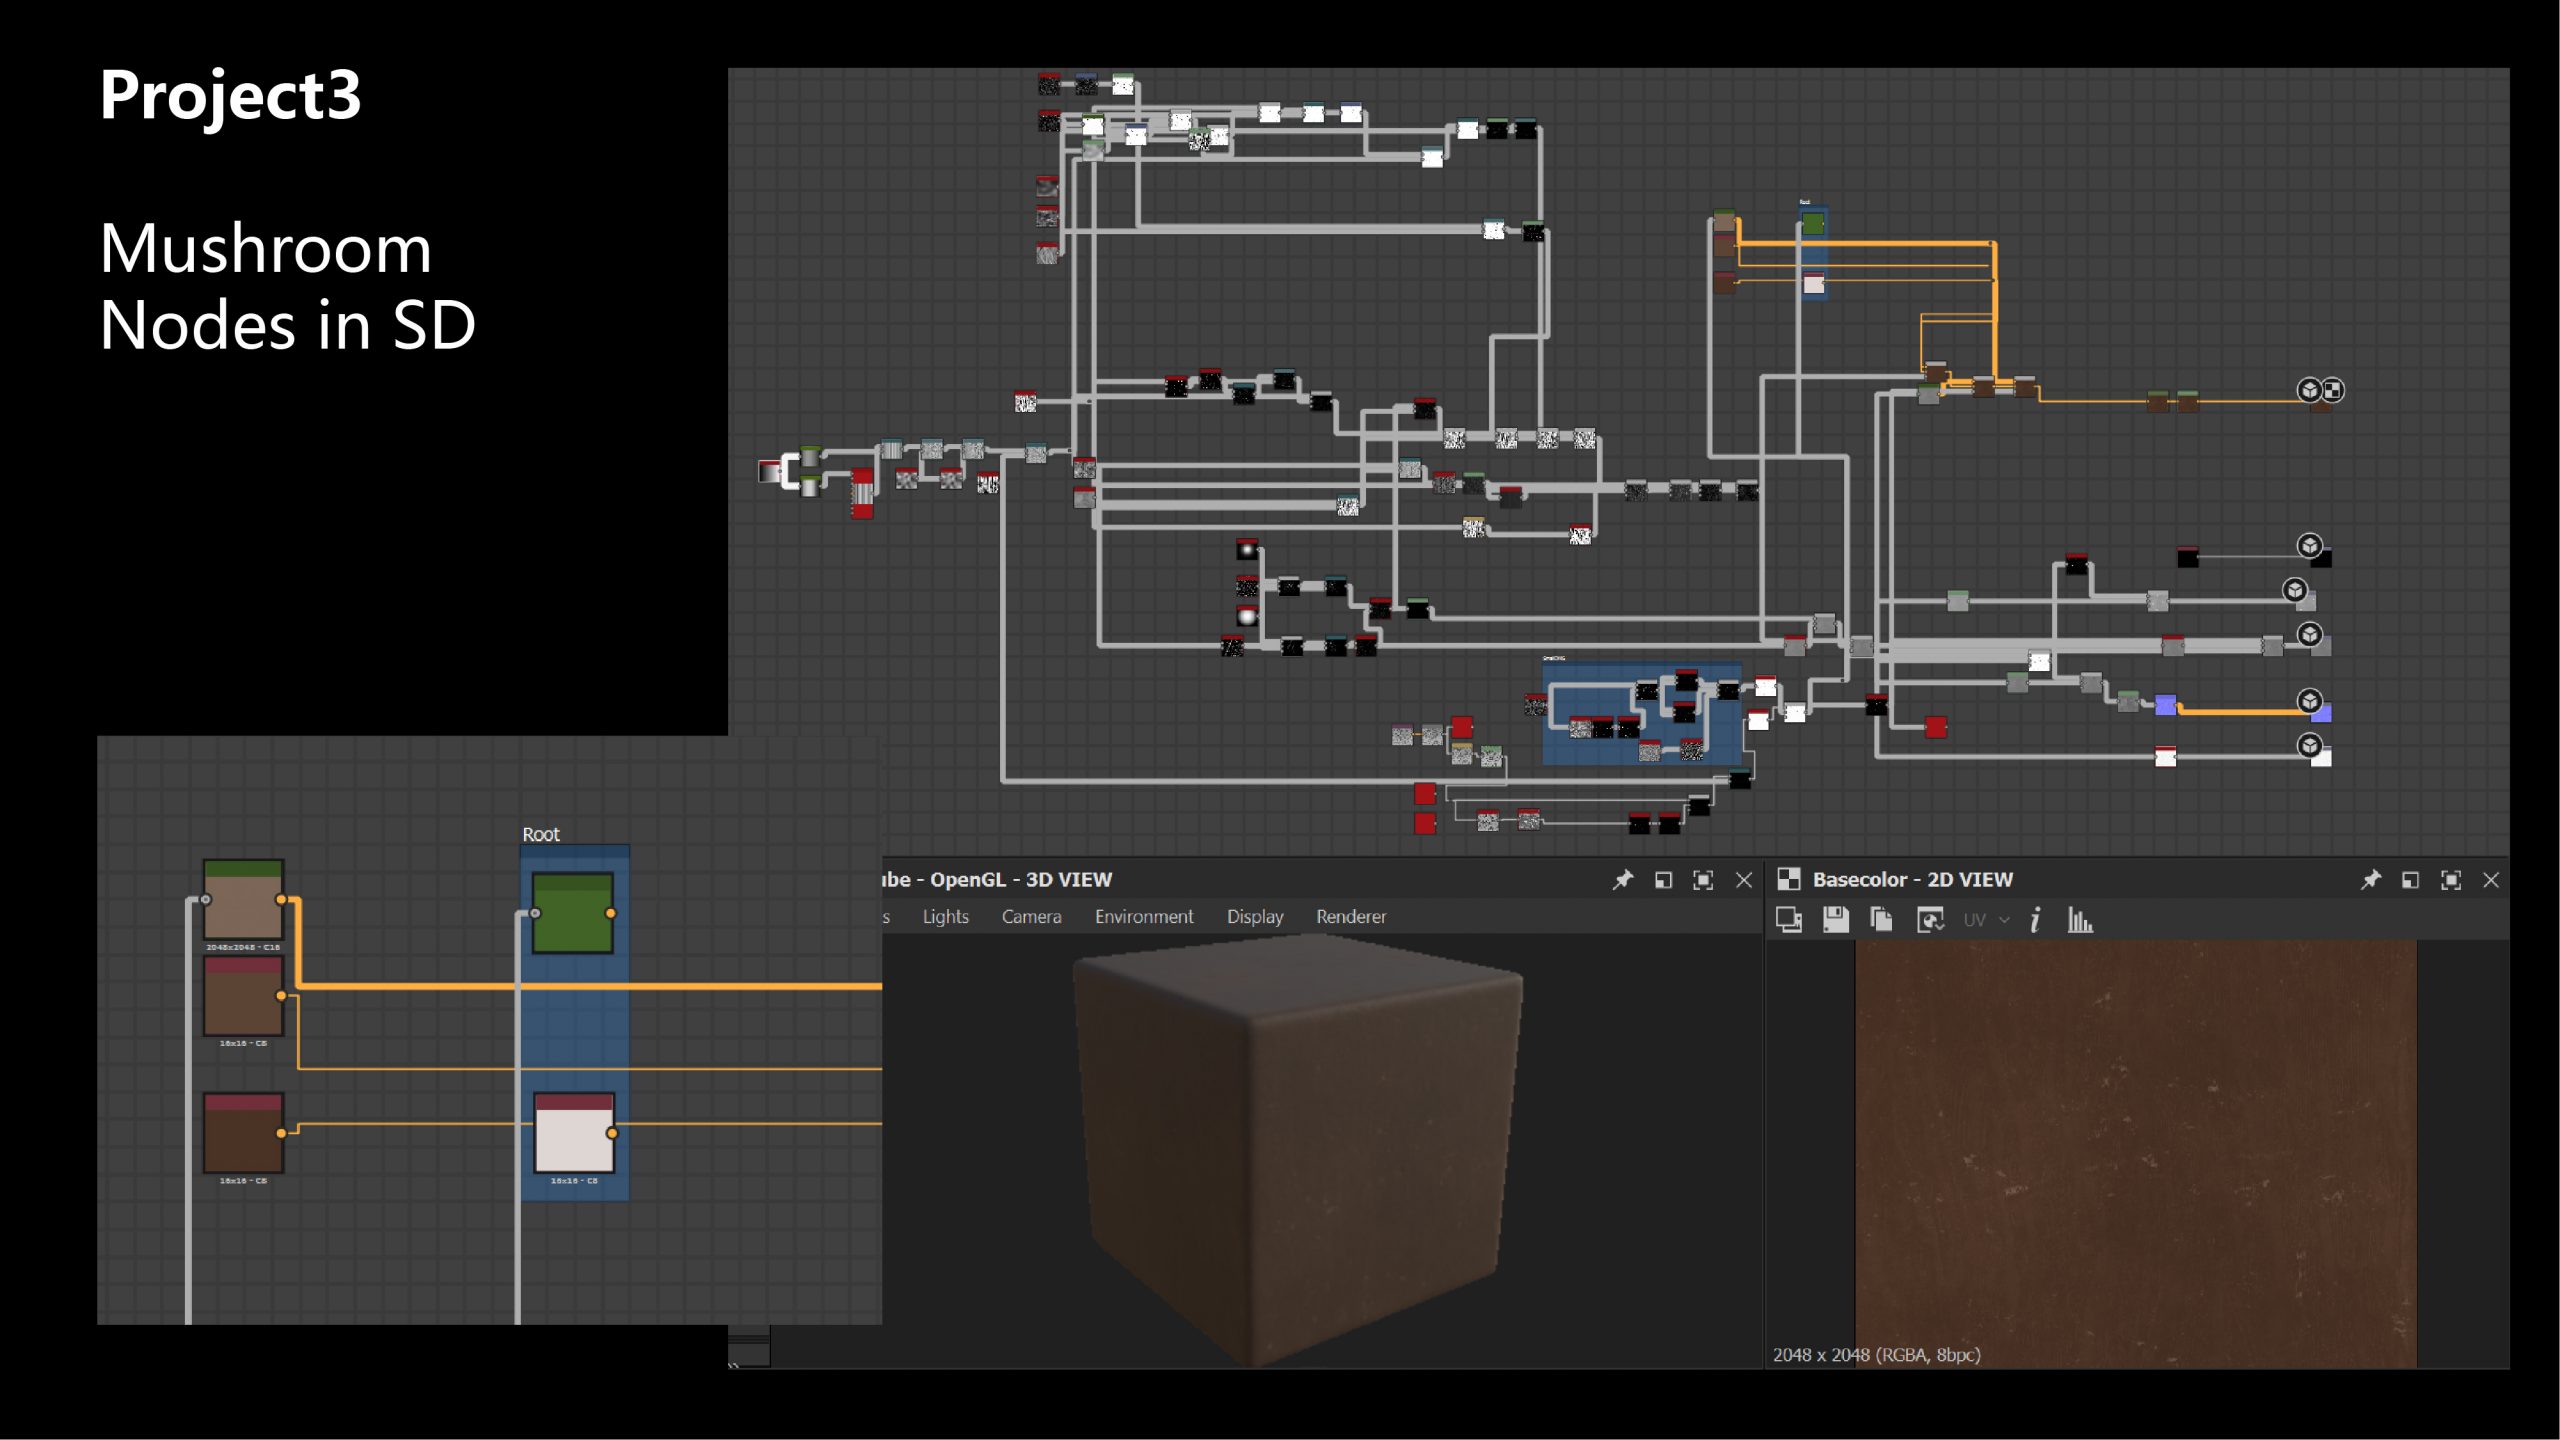
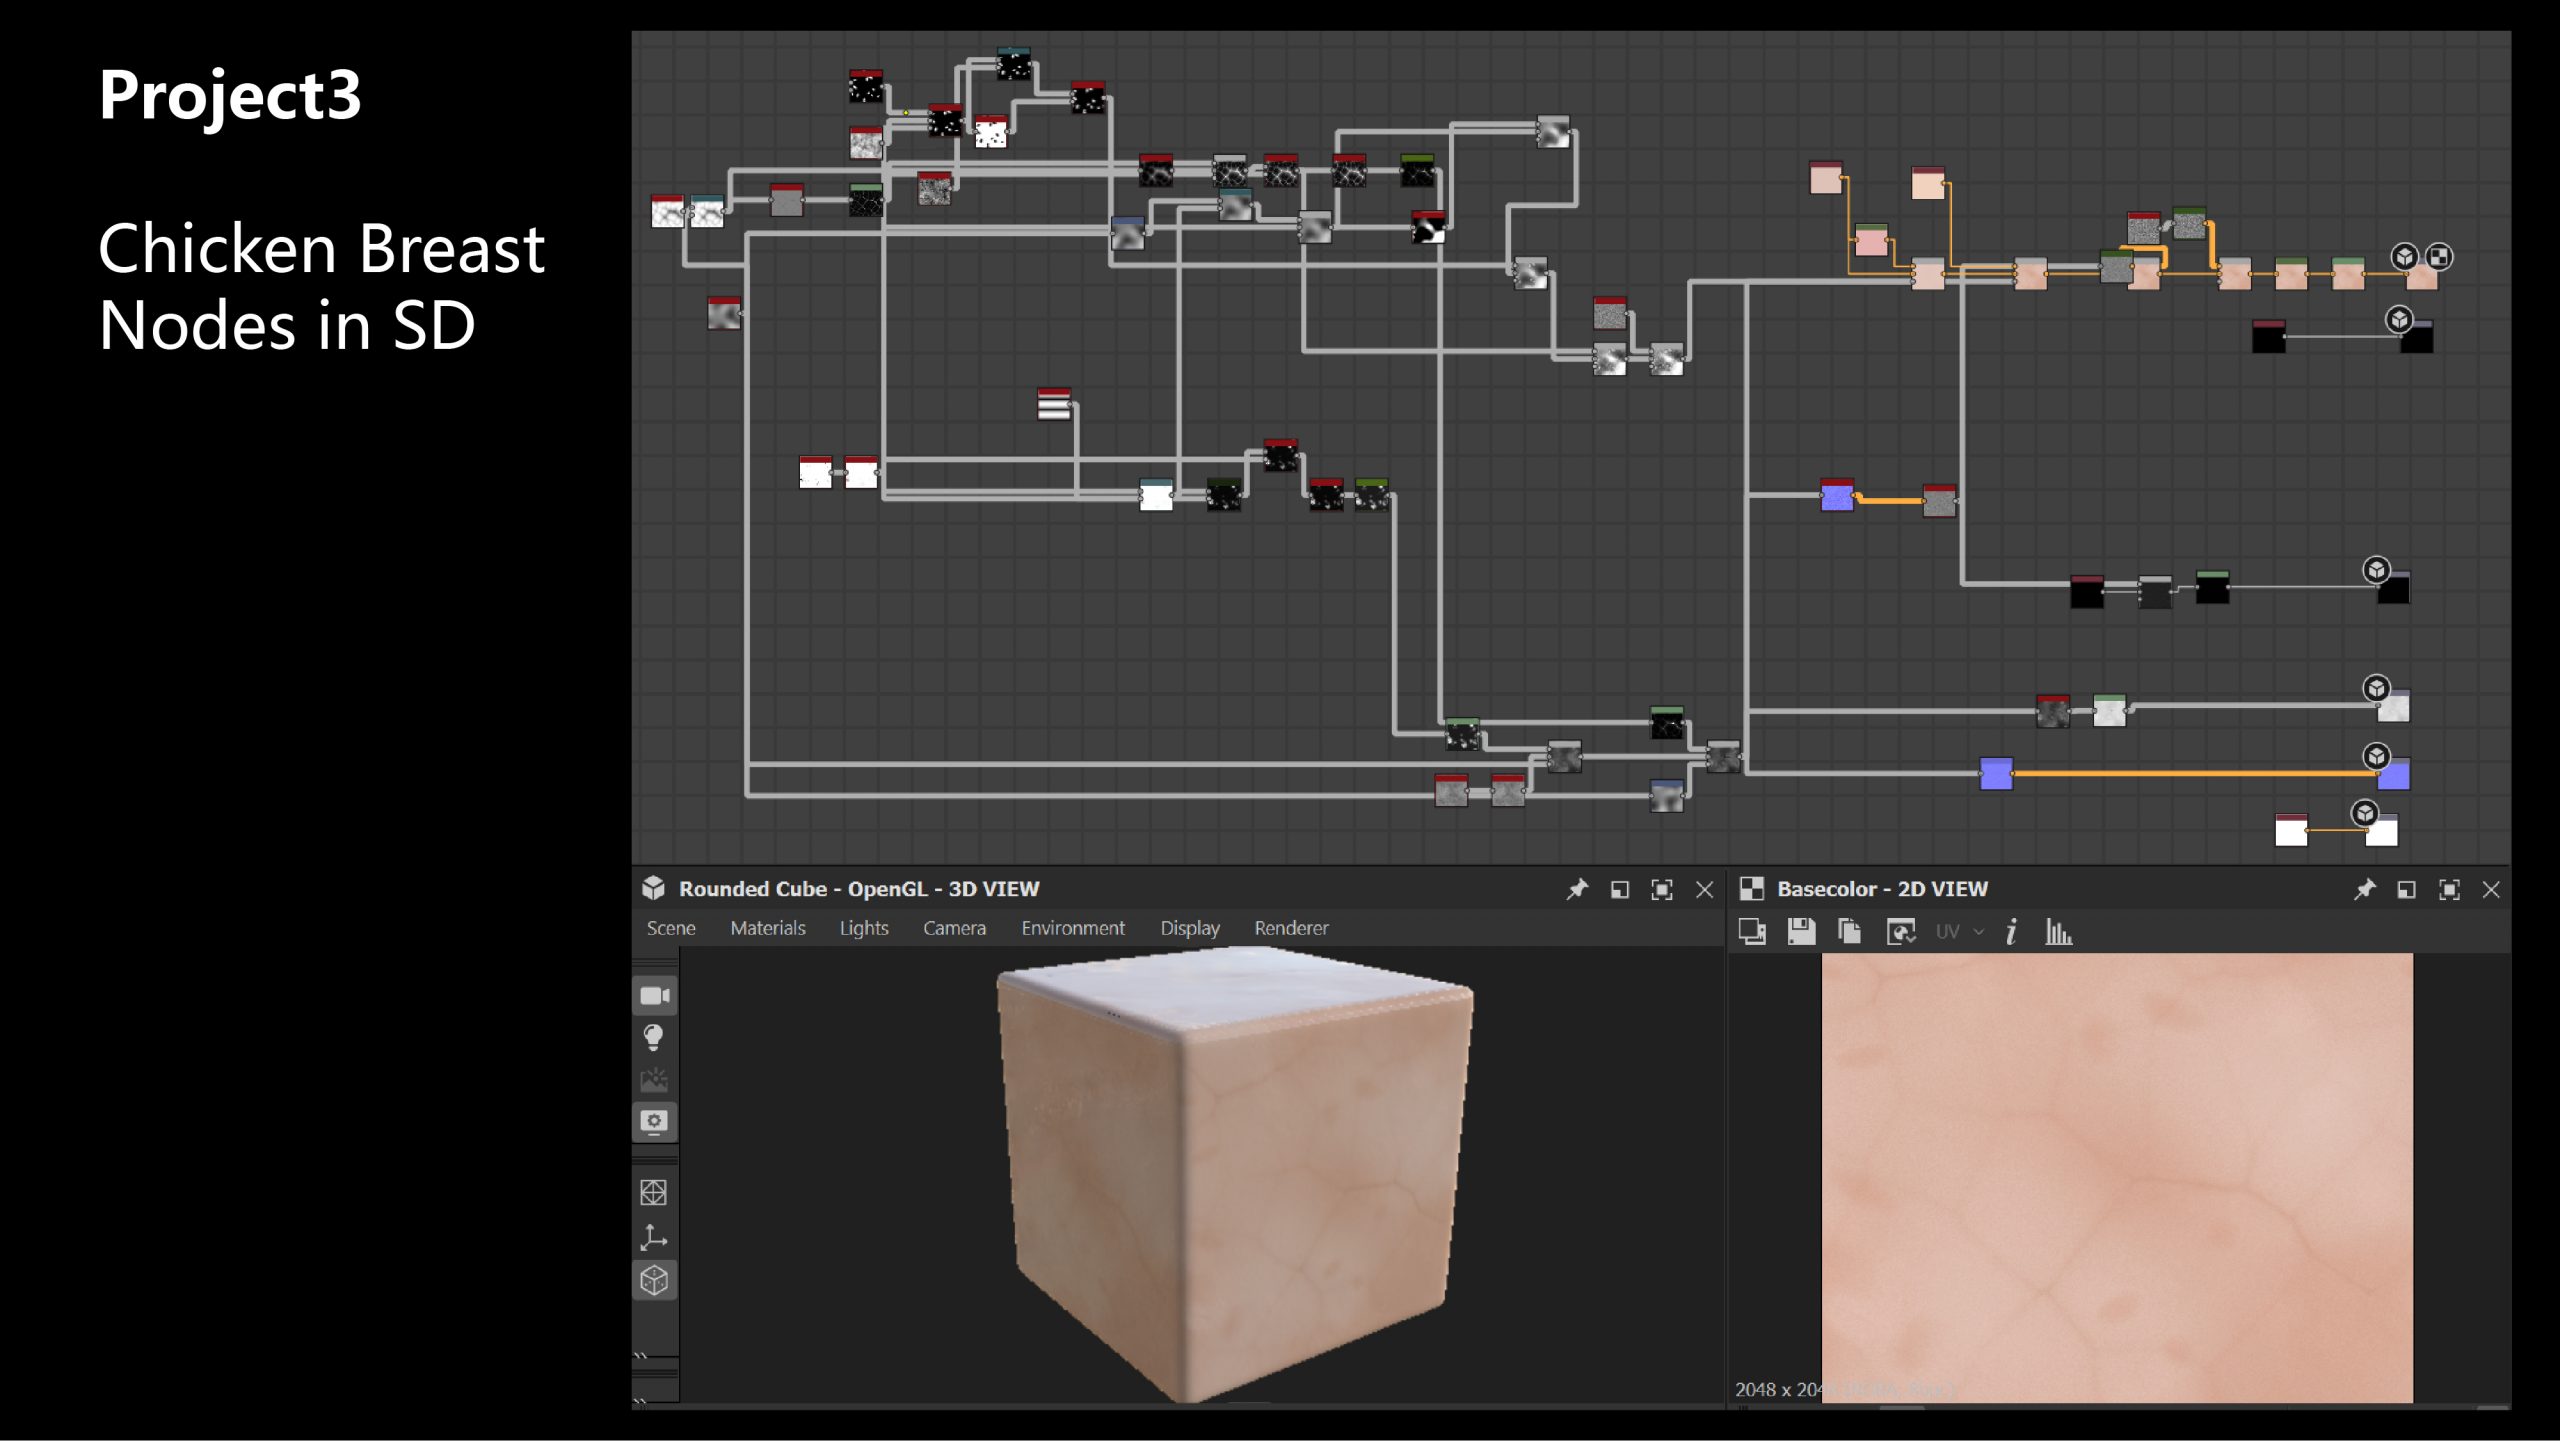
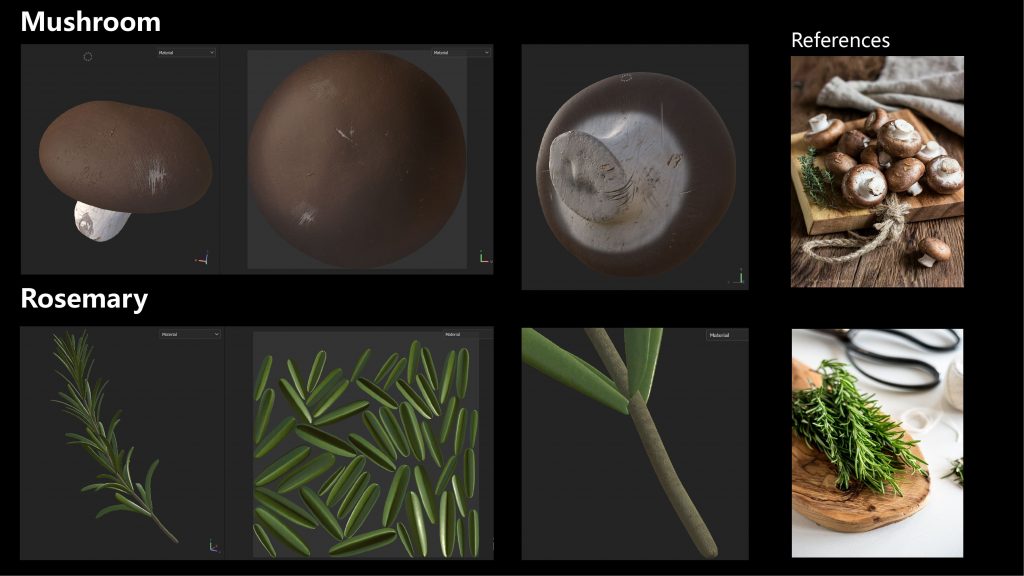
- For the mushroom, it’s important to note that its surface is not entirely smooth but includes a fibrous texture, which provides highly realistic details when showcased in close-up shots during post-processing.Moving on to the chicken breast, the critical aspect of this material is replicating the veins beneath the surface. This detail is crucial to ensure it resembles real chicken rather than pink marble.
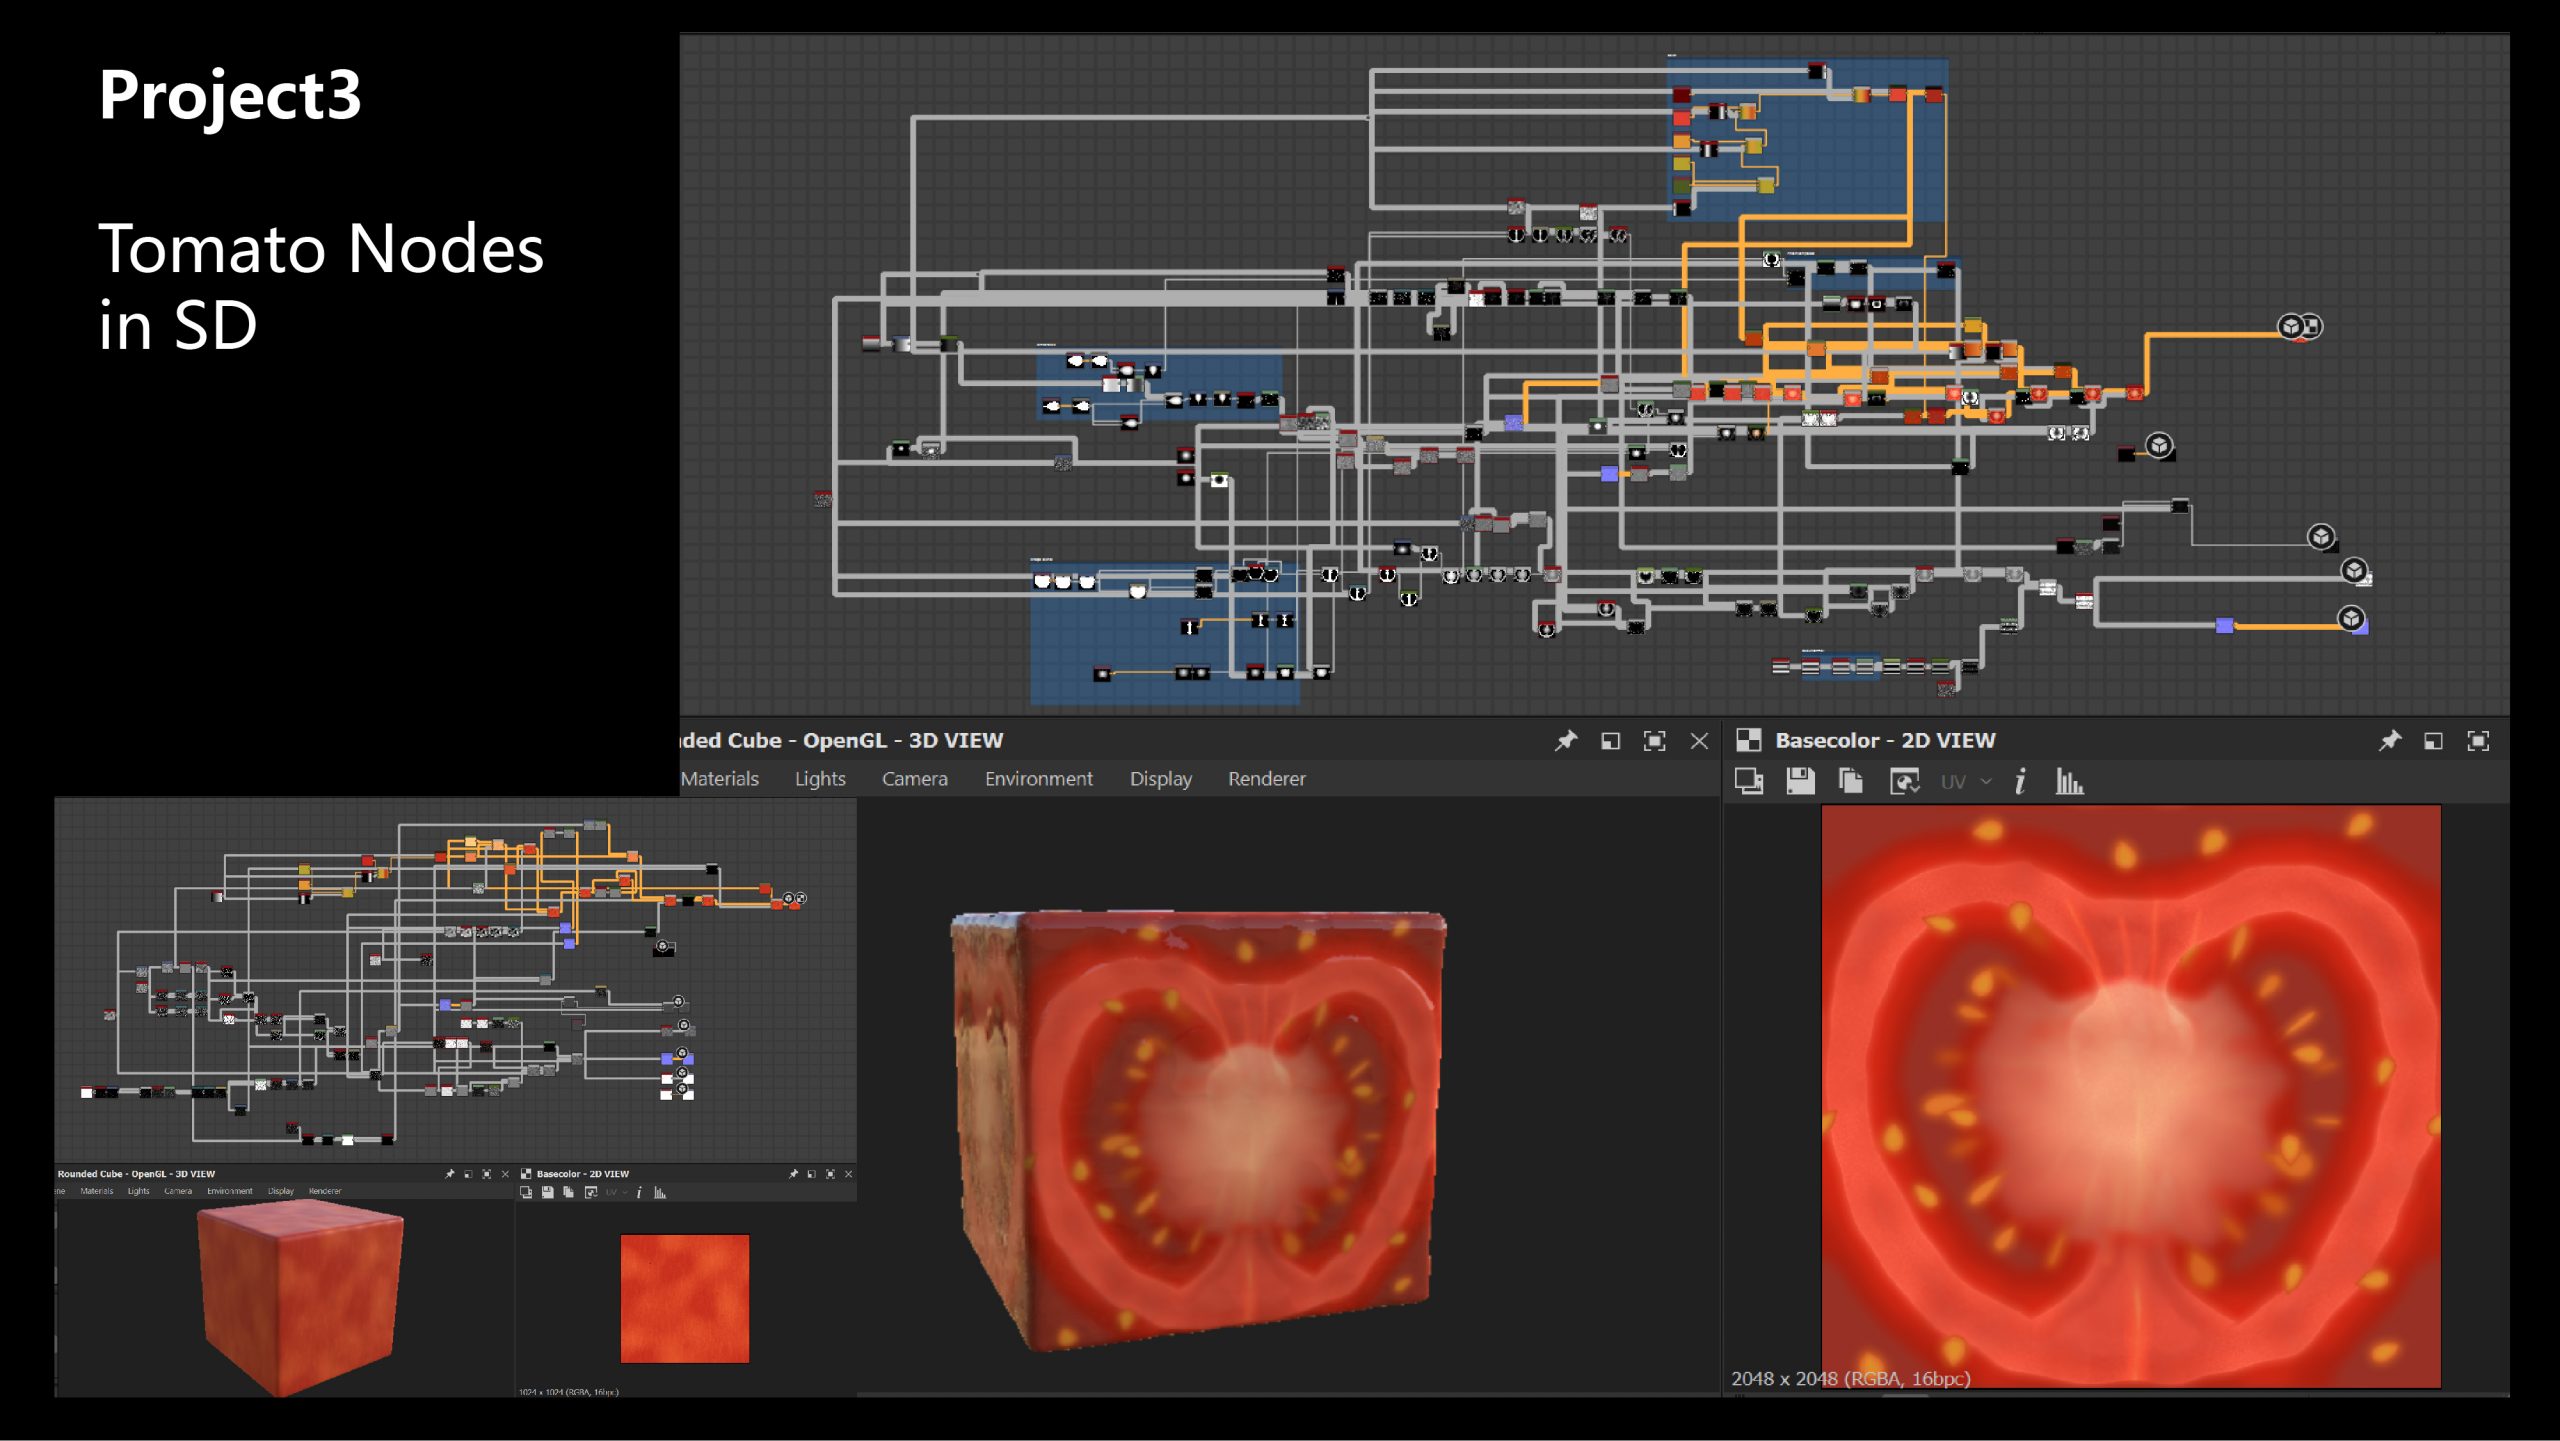
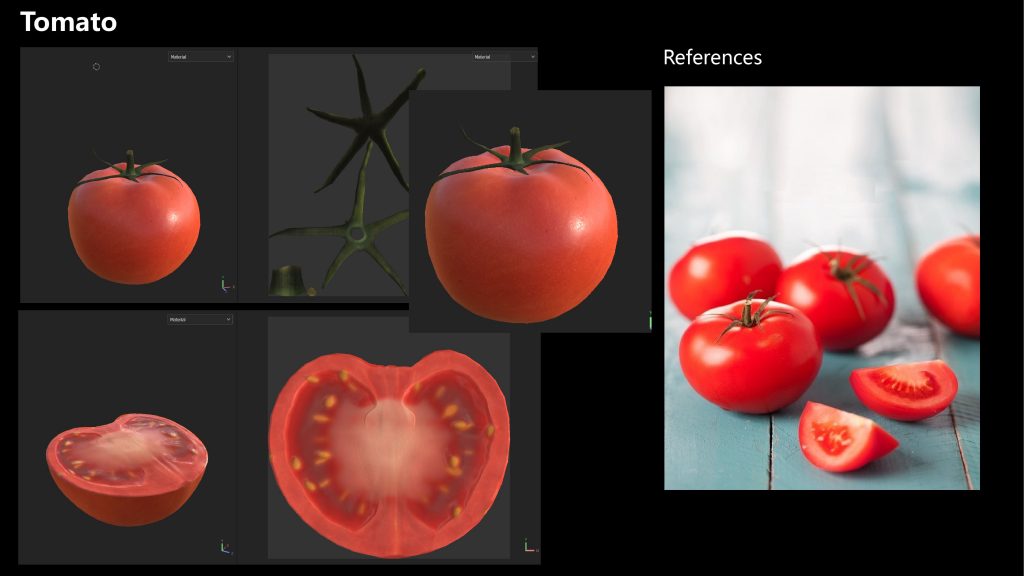
- The tomato material proved to be the most challenging in this project. The skin isn’t just a uniform red; it features small yellow and black dots that add intricate details. The interior texture is somewhat similar to that of the kiwi. The key process involves shaping, blending, and building up the details piece by piece, always starting with the Normal/Height map.
- Model Preparation
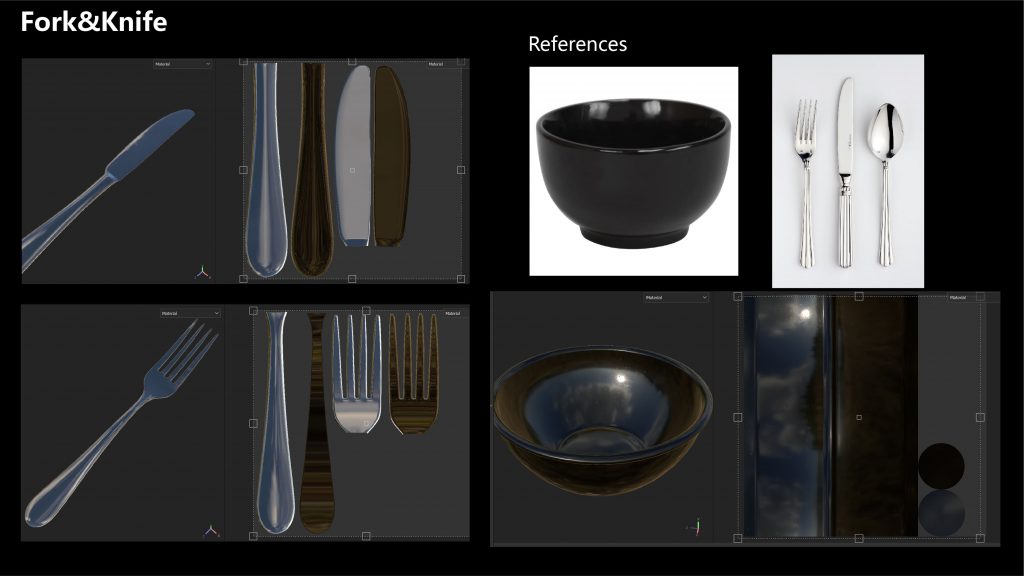
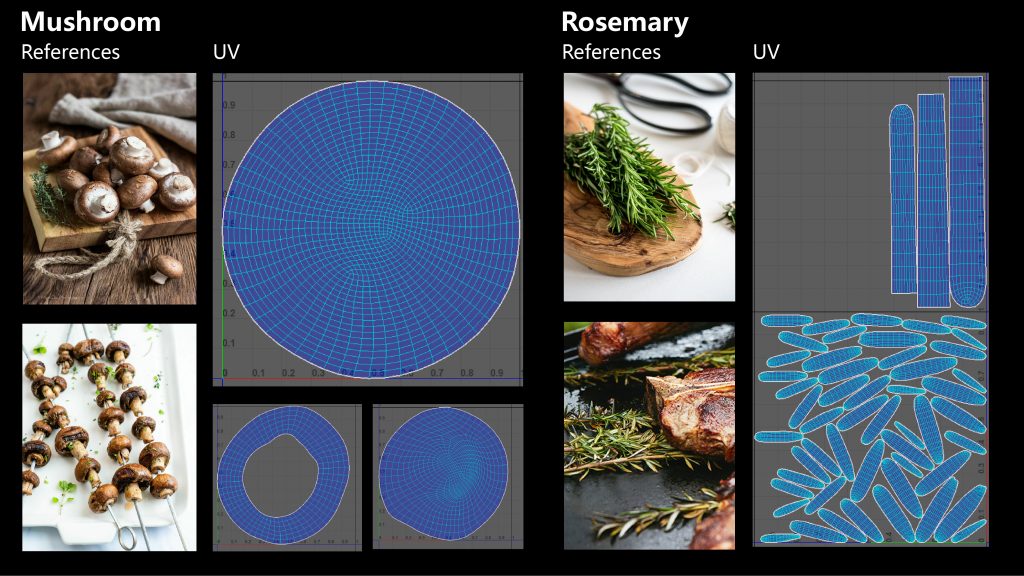
- The 3D meshes for this project were partially sourced from Sketchfab. Some of these meshes were well-made, with clean polygons and well-mapped UVs. However, others were less optimal, featuring excessive triangles. To address this, I first imported the problematic meshes into ZBrush, where I used ZRemesher to convert them into quad faces, ensuring a manageable face count. Finally, I refined the UV mapping in Maya to achieve precise and efficient UV layouts.
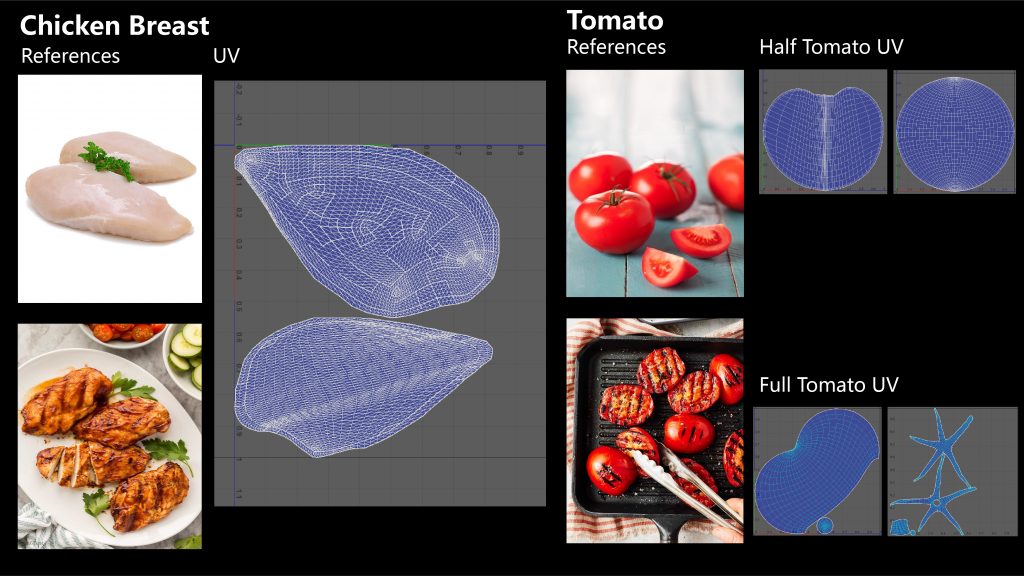
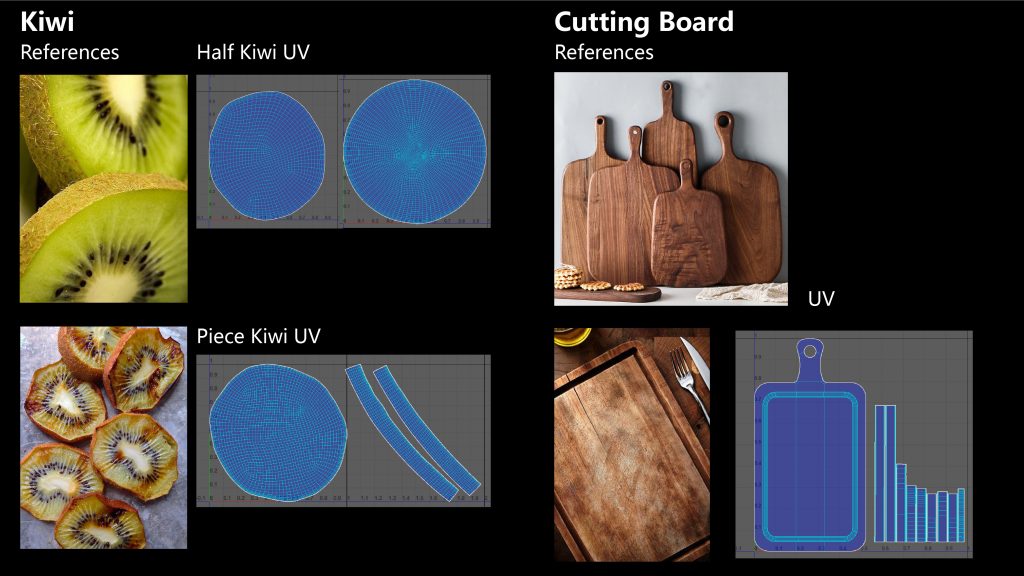
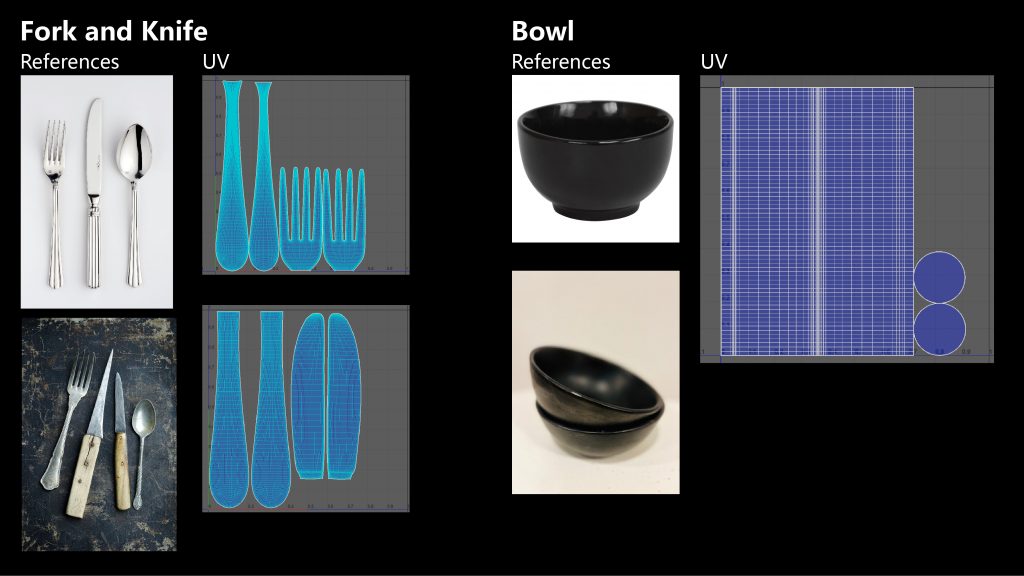
- Making Texture in Substance Designer
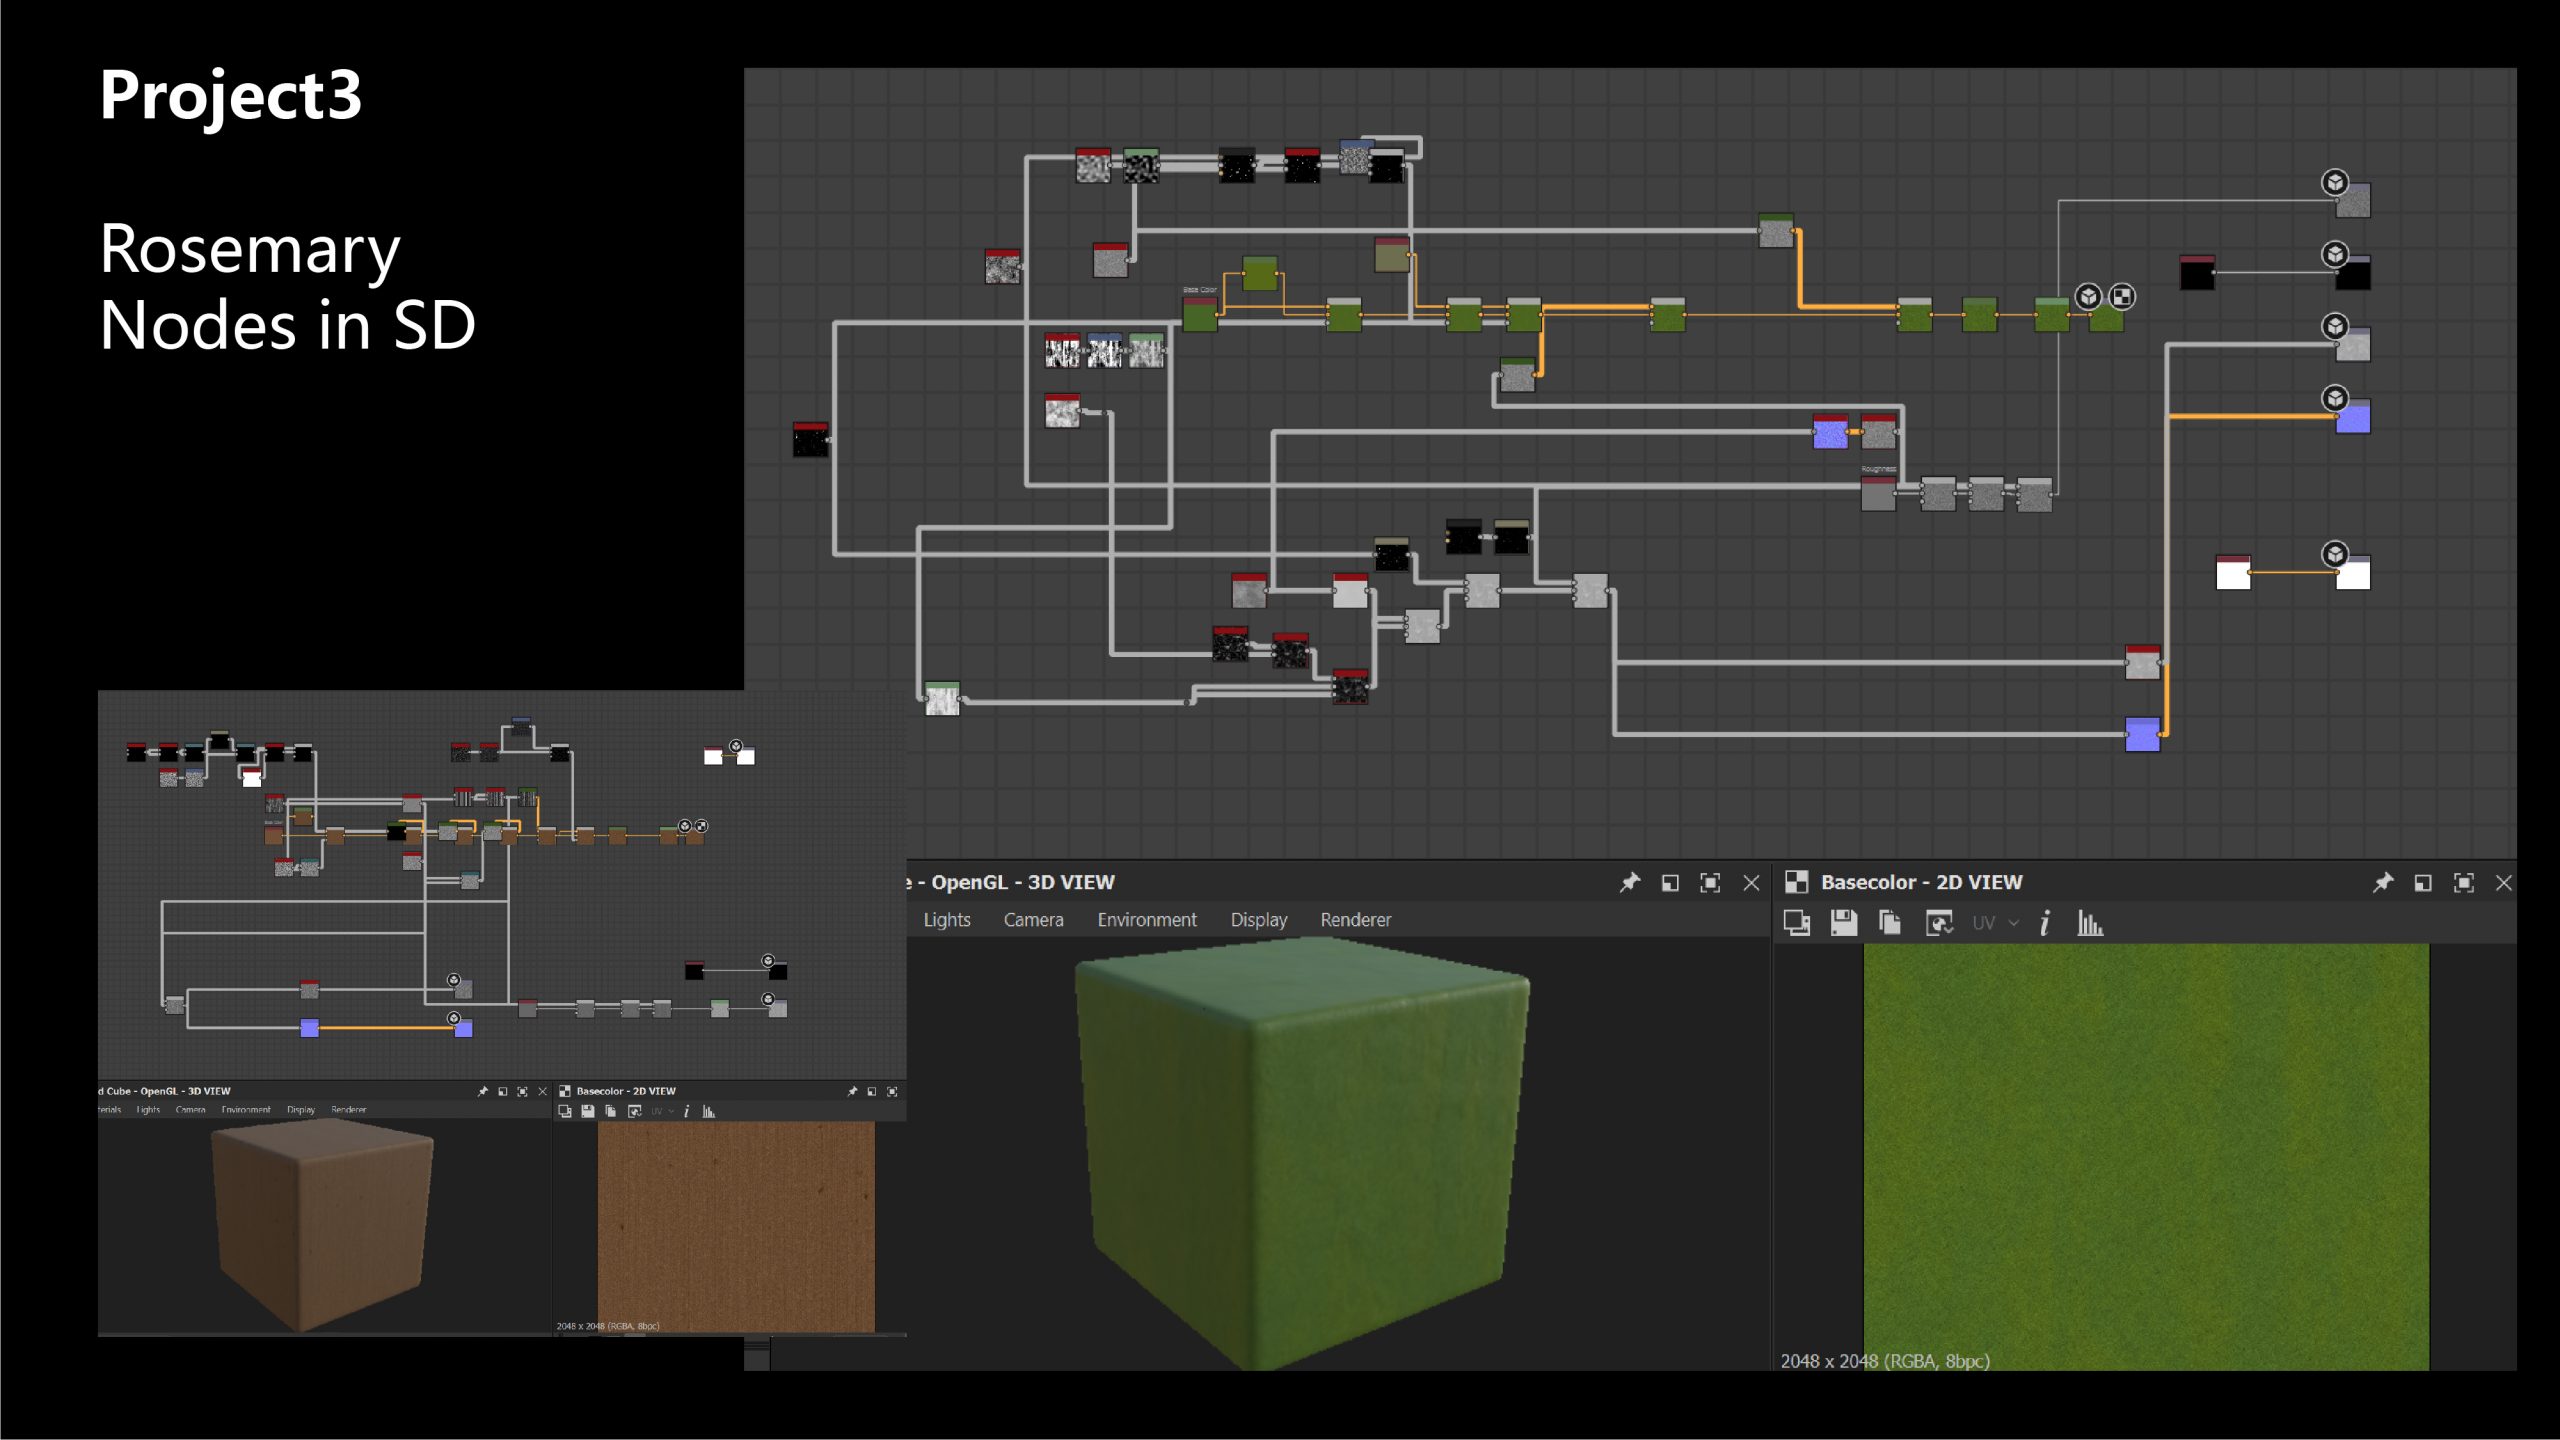
- I began creating materials in Substance Designer, using the default Metallic – Roughness template at a 2K resolution. My initial focus was on developing the shape and color map, leaving scattering to be handled in Substance Painter. All the organic materials in this project contain intricate details, even the tiniest ones. Therefore, it’s crucial to scale the noise size appropriately and avoid overusing blur nodes on small details, as this can detract from the material’s realism.
- Before exporting the SBSAR file to Substance Painter, it’s essential to expose the values of all nodes that might need adjustment in Substance Designer, such as normal intensity, color saturation, and other relevant parameters.
- Making Texture in Substance Painter
- When bringing textures from Substance Designer into Substance Painter, I aim to incorporate as many details as possible before importing them into UE5. For example, with the mushroom, adding scratches to the top and bottom areas makes it look like it has been handled frequently. I also increase the normal intensity value and add more fiber details to enhance realism.
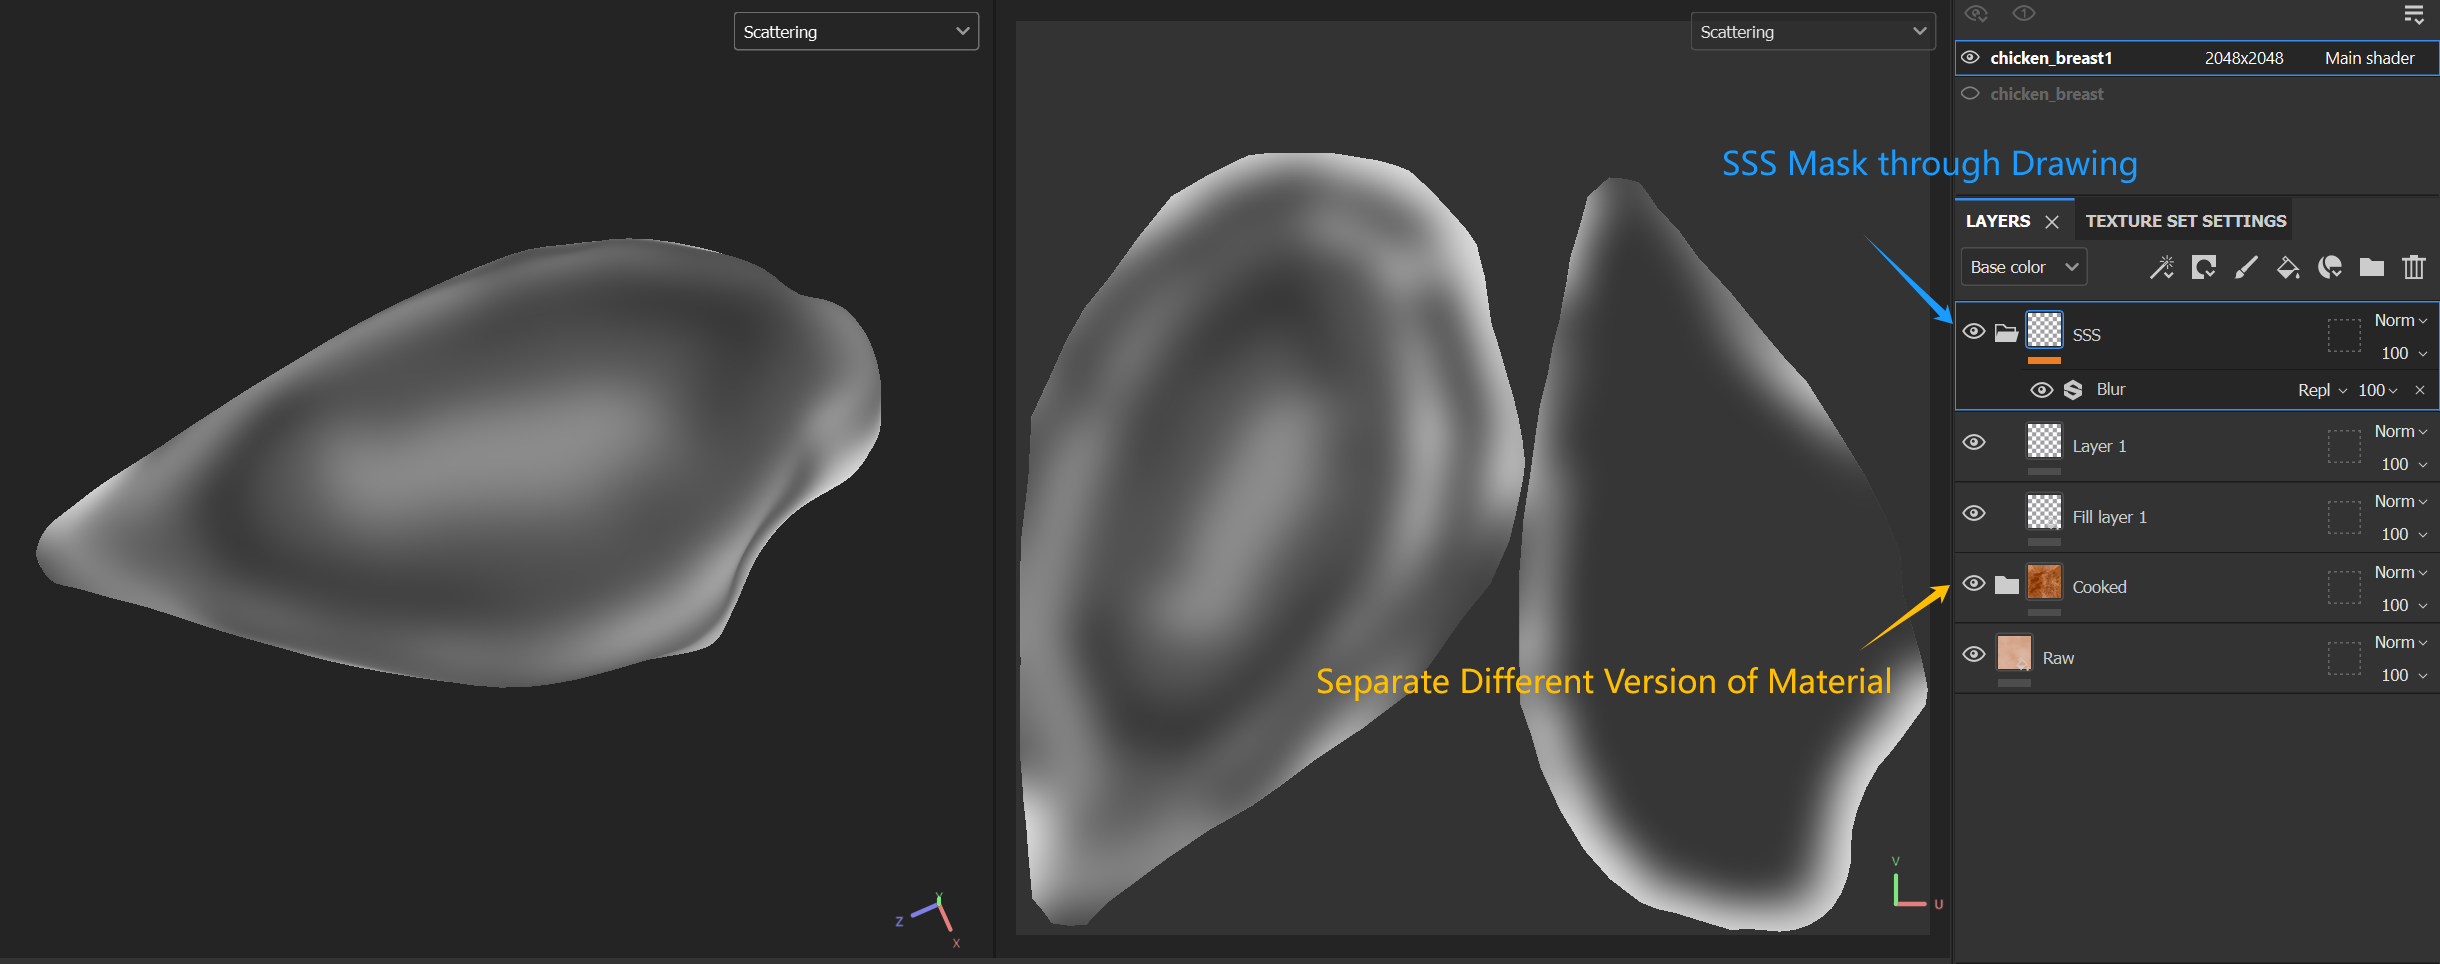
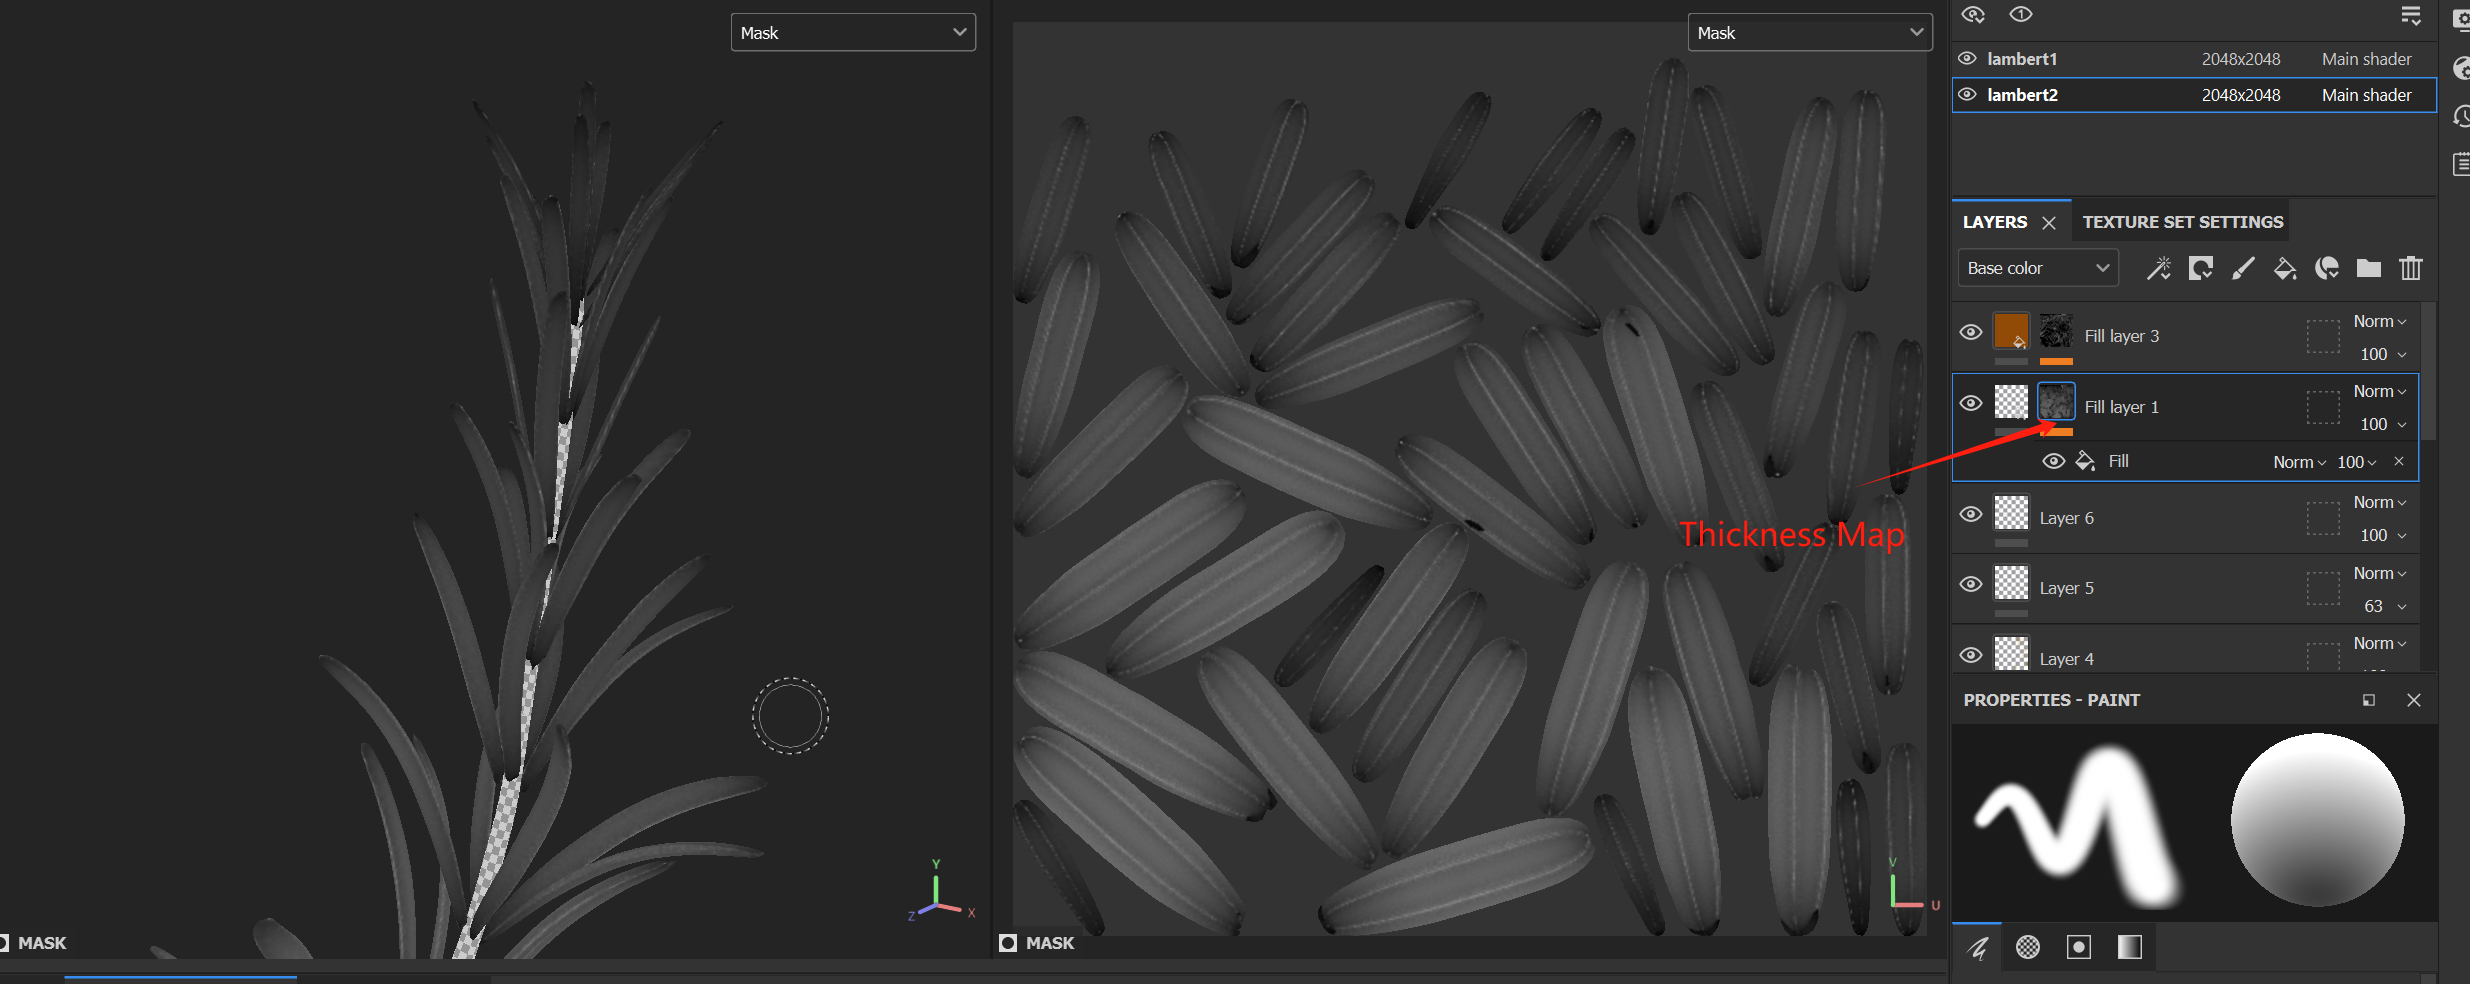
- Before creating the scattering map, several steps must be completed: activate the scattering channel, bake the texture map for each mesh, and then add the scattering map. Both hand-drawn and thickness methods can be used for scattering, and it’s important to try both to determine which works best for each mesh.
- For the cooked version of the materials, I avoid altering the raw material directly. Instead, I create a separate folder for the cooked versions and duplicate the raw materials. This is crucial because cooking can significantly change the surface appearance, as with tomatoes. Avoid using a single layer for all changes. Use one layer for the normal map to show surface scars and another layer for the interior texture and color. This approach provides greater flexibility when adjusting details.
- Mesh Set up in UE5
- I created four camera movements for the sequences, each with a slow speed to allow viewers to easily appreciate the material details. The frame rate is set at 30 fps, and each shot will last for 5-6 seconds. Additionally, all four camera moves include close-ups to showcase the fine details.
- Here is a checklist to ensure everything is set up correctly:
- HDRI Lighting
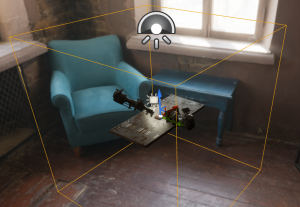
- I designed the scene to evoke a brunch-time atmosphere, with bright and clear lighting. For this, I used an HDRI from Poly Haven. Since I employed Subsurface Scattering (SSS) materials in this project, there are instances where the meshes with SSS materials lose their shadows. To address this, I added a rectangular light. This light should be smooth enough to seamlessly blend into the HDRI environment, effectively restoring the shadows without noticeably affecting the overall scene lighting.
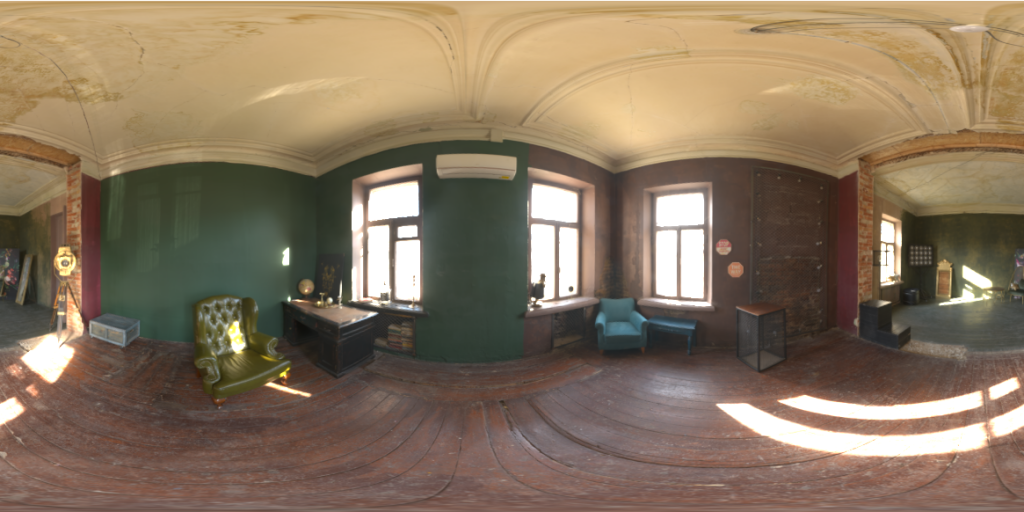
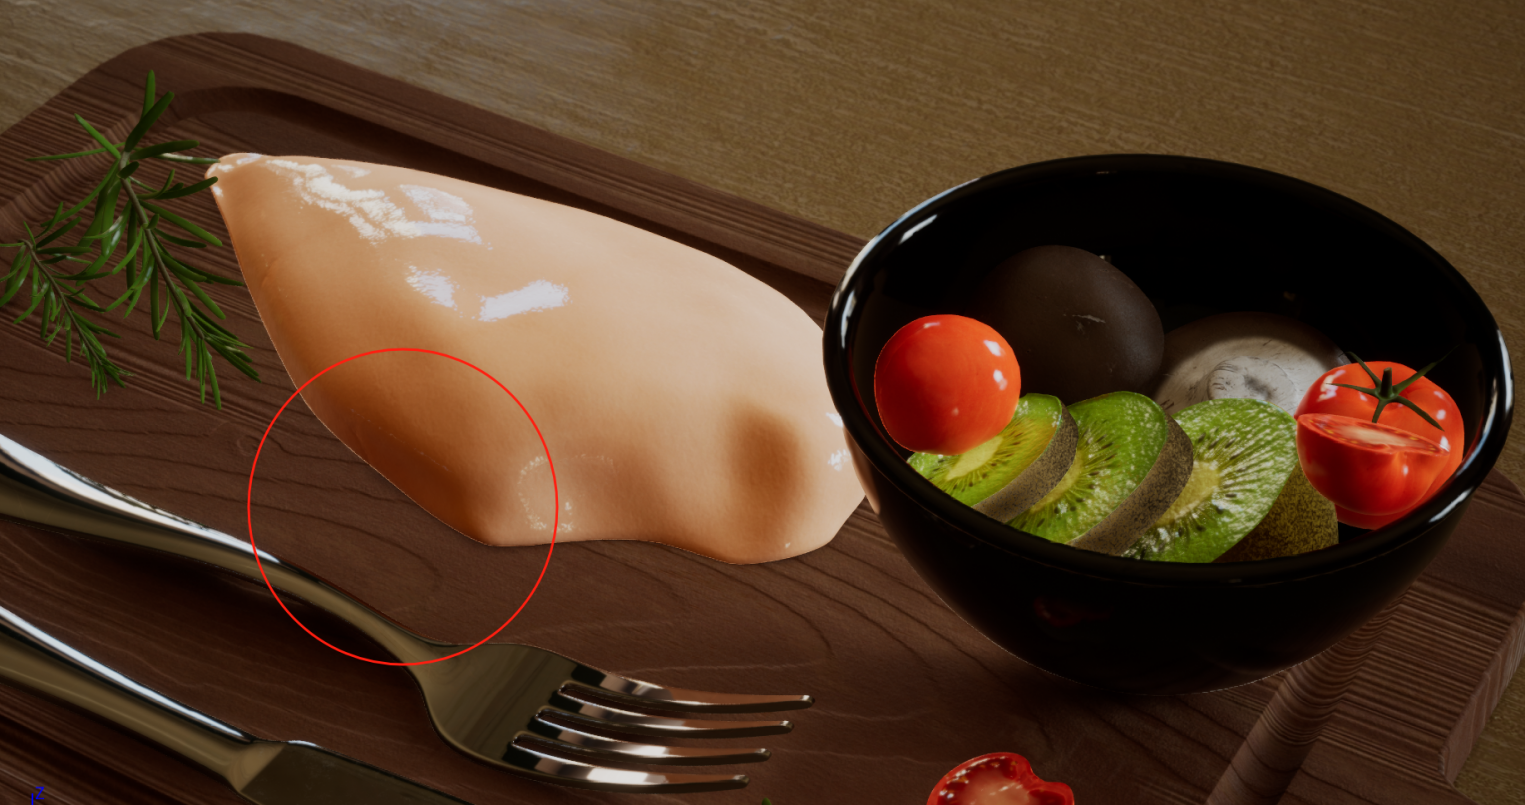
Without Rectangular Light
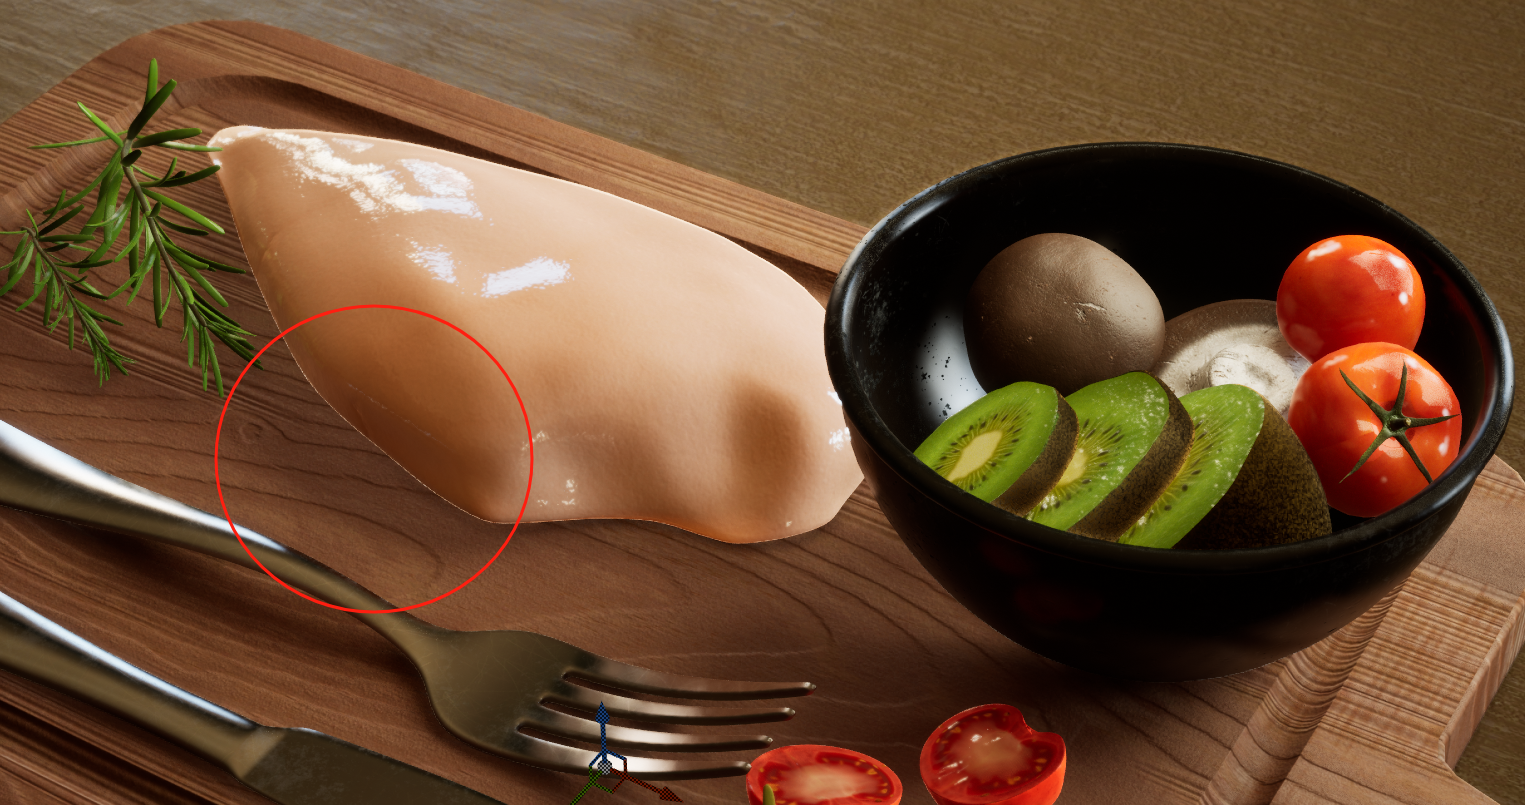
With Rectangular Light
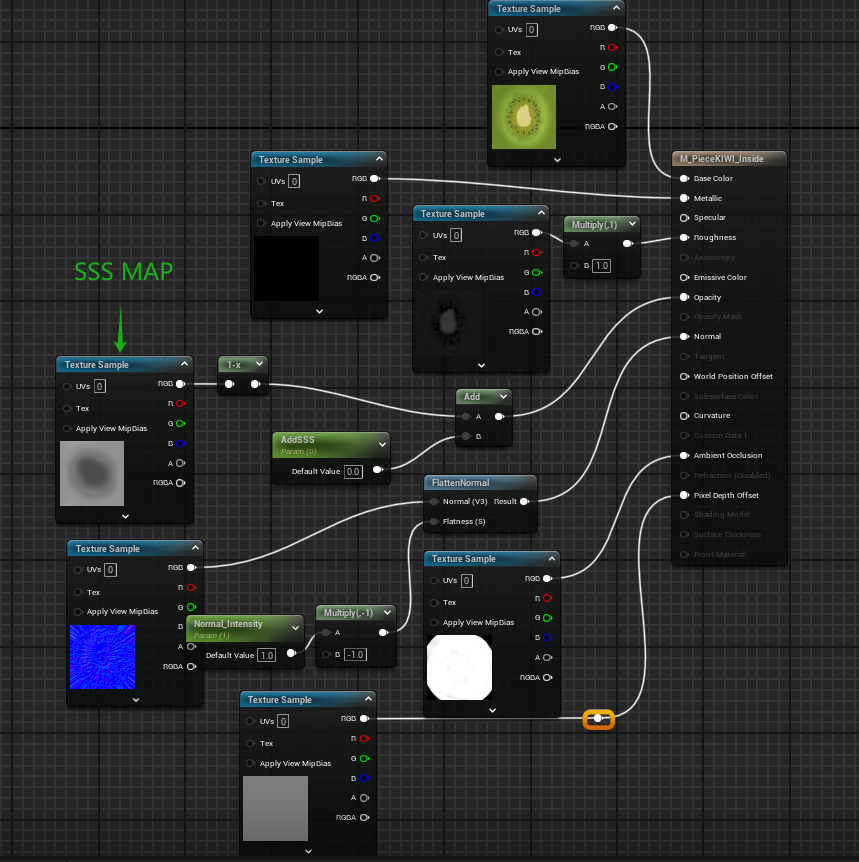
- SSS Material Set up
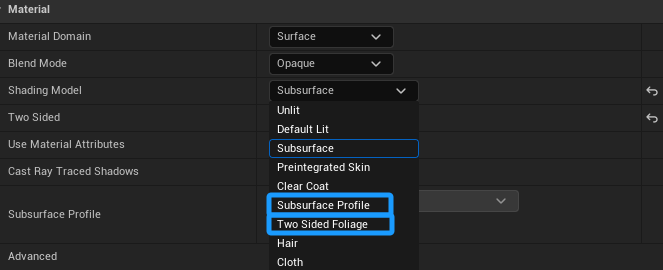
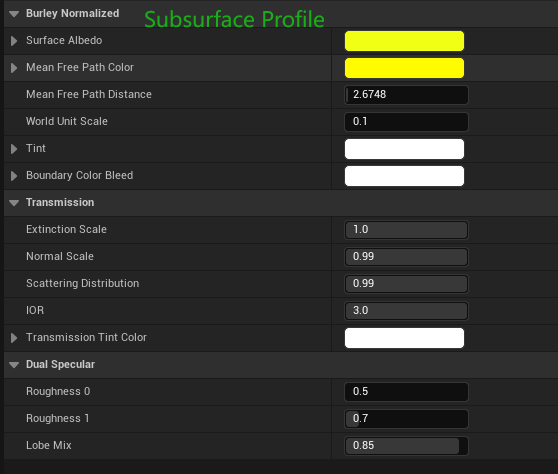
- Here are a few approaches to consider: after creating a new material, we can utilize either two-sided foliage, subsurface scattering (SSS), or subsurface profile. The choice depends on which option best suits your needs. For instance, I used subsurface scattering for the chicken breast and subsurface profile for the kiwi and tomatoes. This decision significantly impacted on the final presentation, emphasizing the distinct characteristics of each material.
- Post Volume Process Set Up
- I encountered a significant issue during my final movie rendering—persistent shadow flickering. To address this problem, open the Post Volume Setting, type “Final Gather” in the search bar, and adjust the volume to either 30 or 50. This simple adjustment should effectively resolve the flickering shadow issue.
Final conclusions
In this project, I’ve become much more proficient with Substance Designer (SD) and Substance Painter (SP). Although it was challenging initially, breaking down the process into smaller steps made everything much more manageable. I’ve learned that experimentation and trying different approaches are key to achieving the desired results, especially when it comes to scattering.
I would like to express my sincere gratitude to Professor Prada for his invaluable assistance throughout this project. His guidance and support in texture creation and ray tracing setup have been instrumental in my learning journey.
